Home Decorating - Apartment Decorating - Dorm Decorating - Home Decor for the RentALS  
Home Decorating & Interior Design Ideas for Apartment - Home -Studio - Dorm
Find Decorating Home Decor Tips and Interior Decorating strategies for "non-owned" Rental Living Spaces
 

Rental Decorating Digest - Interior Decorating for Rentals

Custom Search
 

Home

 
 The Basics
 ▪
 First Time Renter
 
 Interior Design 101 
 
 Decorating By Room
  Dorm Decorating
 
 Organizing Ideas
  Room Color Schemes
 
 Style Guide
 
   
Do-It-Yourself
 ▪  Bedroom Decorating
 ▪  Budget Decorating Ideas
 ▪  Feng Shui Decorating
 ▪  Gardening Ideas
 ▪  Lamps & Lighting
 ▪  Small Space Decorating
 ▪  Wall Decorating Ideas
 ▪  Windows & Treatments


 Lifestyles
  ▪  Health - Food - Family
  ▪  Money Management 101
  ▪  Product & Book Reviews
   

 Need Inspiration?

  Mail Order Catalogs
   Get catalogs from
   your favorite 
   mail-order companies!

   Unlimited Requests


Sure Fit
Save your old furniture by decorating with slipcovers.

Wall Art and Posters -Decorating Wall Decor
 

more decor...

 Decorating Ideas for Kitchens - Arranging Accessories
 What Items Do I Need to Furnish My First Place.
 What Could Be Missing From your Home Decor?

HomeBudget Decorating >


          Interior Decorating and Design Videos in Rental Decorating Digest
Decorating Videos
             Watch Window Decorating Videos
 

5 Easy Steps to Creating a Distressed Antiqued Look
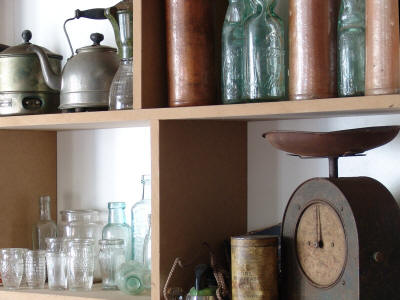
 

The distressed look is very popular these days, with people being drawn to the
character and personality of pieces which have had a long and active life.
However it takes years to get a piece of wood to achieve such a finish
naturally. That’s why many people use the following paint technique to instantly
add unique age inspired touches to pieces they purchase.
 
Step 1: Texturing the Wood
 
You want to start off by scoring the wood with a nail, screw, bolts, or some
medium grade wire brush. Create marks and indentations in the surface at random,
to simulate the look of wear and tear. Try to create a subtle texture that
doesn’t follow any discernable pattern, across the entire face of the piece.
 
Step 2: Sealing the Surface
 
Mix one squirt of burnt umber universal tint into some clear interior latex wood
stain. Mix them, and then apply a smooth even coat to the entire surface of the
piece. This has the effect of protecting and preparing the wood, giving it just
a hint of color while also leaving the material looking aged and weathered.


Step 3: Base Color
 
Once the sealer has completely dried, mix your base paint using eight parts
black, and one part water. Stir thoroughly, and then apply it to the surface of
the wood very lightly. The brush you use should only be barely grazing the wood,
with the bristles only mildly dampened by the paint. This will create a washed
out and uneven black backdrop against which you can apply more vibrant colors.
 
Step 4: Primary Colors
 
Take two separate containers. In the first mix Covington Blue paint, glaze, and
water in equal parts. In the second mix Lafayettegreen paint with equal parts
latex glaze. Apply first one, then the other, in languid, patchy strokes. You
don’t necessarily want the entire surface coated, and some soft blank spots can
feature only one color, or the other. Just make sure you don’t glop it on too
heavily or you’ll make more work during the next step.
 
Step 5: Finishing
 
Once the paints have all dried, take some medium grade sandpaper, and lightly
remove the color anywhere that the piece would naturally be worn. This can be
anywhere that you find moving parts, pieces that touch one another, or hinged
joints. Once complete, use a medium grade wire brush to score the entire
surface, creating tiny cracks in the paint to simulate age.
 
This article is provided courtesy of PebbleArt and their line of Sandstone Drink Coasters which are hand crafted from real, mountain born, naturally absorbent materials. The author of the article is stone designer Joey Pebble.


Decorating and interior design tools for apartment - home - studio or dorm.

October Features

5 Easy Fall Updates for the Home

Use What you Have Decorating - Balanced Decorating

Affordable Fall Decorating

 Follow Rental Decorating Digest on
Follow Us On Twitter!

NEW! Rental Home Remodel
Day #1
DEMOLITION DAY!


"The Renters" are getting ready for their remodel! Watch as they set the stage of events that will be happening and you get a lay of the current floor plan. This rental home remodel is estimated to take between 8-10 weeks as they are moving themselves out and then into their landlord provided trailer located on the property...
Subscribe to Watch Weekly Updates 


 FEATURED CATALOG

 
THE COMPANY STORE

 Image of The Company Store from The Company Store catalog
 All of your must-have bed and bath essentials with a luxurious assortment of upscale bedding and linens.
 
 
Browse this free catalog and get inspiration for your space!


Send Me This Catalog

Decorating Videos

Candy Series - OS & Applications Royalty Free Stock Vector Art Illustration

Watch Interior Design Videos
Your spot for interior design
 and home decorating videos.

Rental Decorating Digest!


Email Marketing by VerticalResponse


 The Top 5 Decorating Topics  Interior Design | Decorating by Room | College Decor | Budget Home Decor Ideas | Wall Decorating

About Us      Media Kit     Partners   Opportunities   Resource Guide     Press     Contact Us 

Use Disclaimer
Copyright 2000-2012 Rental Decorating Digest. All Rights Reserved